Tag: Design.

50 Web Apps for Designers

In this post I just want to direct you to an article I found on WebAppStorm.net It’s a great resource of tools you could use as graphic designer from invoicing tools to time tracking, to project management. I thought it would be useful to you so I’m passing it along.

Dropbox, Mint, Twitter, Skype and Facebook are my favorites of the list, but there are tons of great apps there. Action Method looks really great, but as I mentioned in a previous post I use Things for my GTD system. Most of them are in groups such as “invoicing tools” and I can’t imagine you needing more than one, but this is a great starting place for you to make your choice. So check them out and see what fits your needs best. It’s good to stay plugged in and know what is out there, especially in today’s market. Who knows you might even win a job because you gained trust and established yourself as an expert because you are able to recommend one of these tools to a client or potential employer.

Adobe Kuler

There are certain brands that I find myself being loyal to – most often because they are consistently producing superior products, and second because they have successfully convinced me that they are good. Adobe is one of those brands I love because they keep putting out awesome products. True, I have a complaint here and there (I know memory is cheap but does Adobe CS really have to fill a dual layer DVD? come on) but on the whole I’m very happy when they come out with new stuff and it tends to inspire me. I’ve been a champion of InDesign since the beginning (mainly because I hate Quark Xpress and any designer who prefers it is clearly thinking WAY inside the box) and spearheaded the change over at every place I’ve worked over the past 10 years since it’s debut. Clearly I backed the right horse because who uses Quark anymore? Dinosaurs.

Anyway, I digress…
What I wanted to tell you about was a very cool new online tool from adobe called Kuler. It is a really great color palette and color scheme picking tool. You can download other peoples palettes that they have saved, or make your own. You can get every color value you could possibly need for print or web, then download your scheme and import it directly into Photoshop, InDesign or Illustrator to use in your design. It’s really fantastic. If you do anything that involves picking color I’d advise checking out Kuler.

oh, and did I mention that it’s free? Yeah, it is. Cool huh?

Here are a few things to consider beyond what you want to say on your blog – I could stand to pay attention to these things as well 🙂

1. Posting Regularly

It’s a good idea to post on a regular basis and even schedule your posts so they go up at the same time each day or each week. This will inspire loyalty amoung your readers because they will get used to seeing your posts and even look forward to them. Another plus to this is that Google will start to recognize that you post at a certain time and you will get indexed faster if you post regularly.

2. Post length

I’d say you’d be doing yourself a favor by being brief, but keeping to a minimum word count of around 250 would be a good target as well. That’s enough for you to get your point across but not so much that it’ll only get skimmed.

3. SEO

Try and think about your keywords and imbed them into your content. This is just good communication skill as well as good SEO – you want your posts to come up high on Google if someone searches for what you are talking about.

4. Promotion

It’s a good idea to promote your blog via facebook, twitter, social bookmarking sites etc etc. Don’t spam people, but it’s perfectly reasonable to post in your status on facebook every once in a while that you have a new blog post and provide a link.

I’ll talk more about promotion and building an audience in a future post, but that should give you something to think about for a few days. Thanks for reading!

Reblog this post [with Zemanta]

I’ve been meaning to write down the steps I use to start a wordpress blog because I seem to be doing that a lot lately, and thought it might be useful to others as well as to myself. Then I came across a great article on the subject by Chris Coyier. He’s got a great method, but I’m going to go through my steps as well and we can see what’s different and maybe discuss why. So here goes…

1. User Management

The first thing I do after installing the latest version of wordpress is add a new user with my own naming convention and password. I usually leave the admin account even though it is default because some of the blogs I set up will have more than one user and I like the idea of having a universal admin.
If there are going to be other users I set up accounts and passwords for them right away if I know who they are. You can add more later as well.
Now all my blogs are self hosted (using dreamhost) and wordpress is installed with one click, but I also setup a new database with a new user on my host for each one. Then I setup email addresses that I want associated with the account.

2. Deleting Defaults

The next thing I do is delete the default category of “uncategorized” and the links category of “blogroll” from the Writing Settings. In order to delete these in both cases you have to make a new category and set that as the default – then you can delete the old ones. I do this because I don’t want any post to be “uncategorized” and I don’t like the way “blogroll” sounds. Plus I think “links” is clearer.

3. Settings

Then I go through each of the settings panels and adjust things to my liking. Most of this information is pretty clear and easy to understand in wordpress, but if you don’t know what something means or why you would want to change it I’d suggest doing a little research before making the change. Generally the defaults are fine, but some things I just prefer to have set up differently.
One example of something I change is the Permalinks – these determine what the url will be for your posts. You’ll want to make a decision about how you want these displayed and stick with it. I personally like to have the date and the post title in the permalinks but it is up to you.

4. Theme

Next I set the theme. There are a few installed automatically, but I have found a ton online and you can generally find a theme that will serve whatever your needs are. You can change your theme at any time, but you’ll need to be careful and make sure it supports the things you need like having enough sidebars or widget support. I also like having access to the image files and CSS so I can adjust the theme to the look of the brand the blog is for.
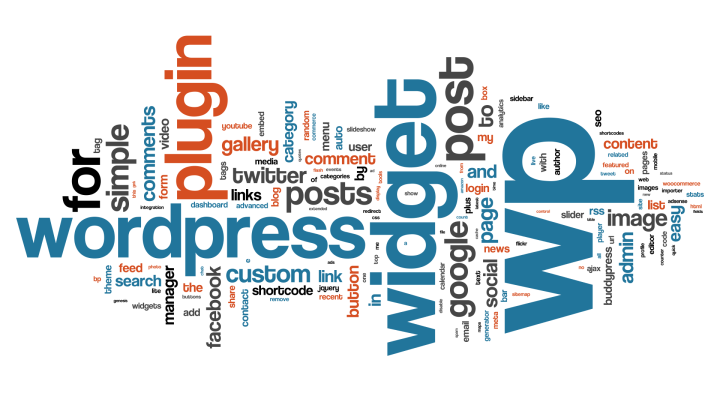
5. Plugins

Next I install the plugins I like to use and are relevant to the blog. There are also a million plugins online that you can sort through and there is generally a plugin that will do whatever it is you need to do. If you don’t know what you need just start blogging and you’ll find your needs popping up in the form of thoughts like “Boy I sure wish my blog could…” – the answer is probably yes it can…so off to the internet to track down the right plugin. In a future post I will go through a few of the Plugins I’ve found that I like and find useful which might help you with a starting point.
Once the plugins are installed then it is time to adjust their settings. Now this can start to get confusing because plugins can put their settings in different places, or sometime be unclear as to how to use them once they are installed. Usually there is a web page devoted to the plugin on the creators website and often they are very clear and informative. Sometimes though, they are not. If a plugin has really poor documentation or is really unclear what the settings do I’ll often go look for another plugin that treats it’s users better, and I usually find one.

6. Widgets

Next I set up my sidebars and widgets, if the theme supports them. This is another thing I try to think through and not really change too much once I’ve set them up because these will become part of the user experience and you want people to be able to find what they are looking for and they won’t be able to if you keep changing them. I only change them when I really find that it will be an improvement for the user.

Okay, I hope that is helpful. I’ll post more on the subject soon regarding widgets and plugins. If you have any questions feel free to post a comment. Thanks for reading!

I found this article today on a Linkedin group I joined called Communication Arts (posted by Jeff Couturier) about 10 very cool Firefox add-ons for web designers.

I was familiar, and used a few of them, but the new ones I found here will become hugely valued additions to my workflow. I can already say after just a few hours that I can hardly remember how I got along without ColorZilla!

I’m going to post the 10 tools below as a list of links, but you can go to the article and read more about them as well as going to the links and seeing what the developers have to say about them.

1. Firebug + Firecookie + Codeburner
2. Web Developer Toolbar
3. Measure It
4. Colorzilla
5. CSS Viewer
6. Screengrab
7. Gridfox
8. Firefox Accessibility Extension
9. User Agent Switcher
10. PageDiff

I found this article by Jacob Gube today on a Linkedin group I joined called Communication Arts (posted by Will Sherwood) about 12 great tools for deciding on a website domain name.

It is a very important step in developing your business or project and it is often one of the most difficult. Every time I try to find a domain name I feel like every pronounceable combination of letters must already be taken! These tools could really help you.

You can go to the article and read more about them as well as going to the links and seeing what the developers have to say about them.

I found this great article with links to more than 20 really great Photoshop plugins for editing photographs. If you are a photographer or just a hobbyist you’ll see that these actions will be a big help in making your images look great. At the very least you can have a lot of creative fun playing around with them and seeing the different results you can get.

If you’re not familiar with Photoshop actions and how they work, why don’t you make a comment about it and if enough people request it we’ll do a tutorial on how these actions are used.

here is the link: http://designm.ag/resources/photoshop-actions-photo-editing/